I use TravisCI for some of my Arduino projects. But Travis announced a new pricing model which no longer has a free tier for open-source projects. While I was looking for another free CI service I learned about GitHub’s own GitHub Actions. As all my hobby-project-repositories are already on GitHub, choosing this was a no-Looks lbrainer. In this tutorial, I will show how you can setup Continuous Integration (CI) for your Arduino Projects that are on GitHub.
What is CI/CD?
CI/CD stands for Continuous Integration/Continuous Delivery. It provides a way to automate your building, testing, and deployment of applications. Let’s say you have a shared repository for an application where different developers are working on different features. By using a CI service, when a developer pushes their code changes, in a dedicated server an automated process builds the application and runs a set of tests to confirm that the newest code integrates with what’s currently in the master branch.

CI for firmware
GitHub Actions make it really easy to set up continuous integration for the language and tooling you want to use. Along with all the popular languages, you can also have make/CMake based C/C++ projects. You will just need to click a button and the rest will be set for you.
But when it comes to firmware, you will also have to consider what hardware architecture the firmware was developed for. And that makes things, well, I wouldn’t say complicated, rather it requires you to do things differently.
How is it different for Arduino?
If you ever worked with Arudino you already know that your project files and libraries do not live under the same directory. You have your project files at one place but your personal libraries can be in another place. Most of the steps for setting up the CI are the same for both cases, except for libraries you will have to add some extra ‘steps’.
CI for Arduino Projects

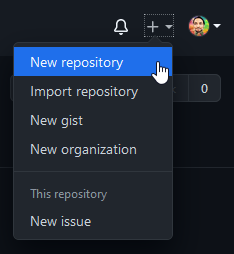
I will use Arduino’s Blink example as my project. Let’s start by creating a new repository on GitHub:
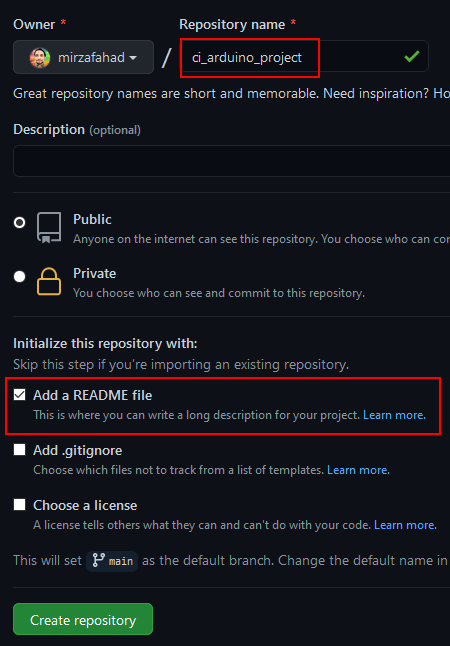
I will choose ci_arduino_project as my repository name and also, will add a readme to the repo.
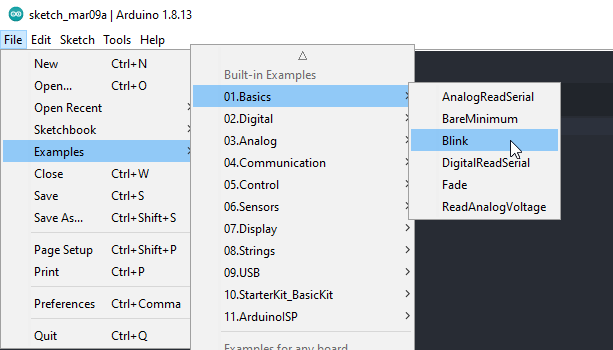
Clone the repo into your local space. I am using Sourcetree. Now, open the blink example from the Arduino IDE.
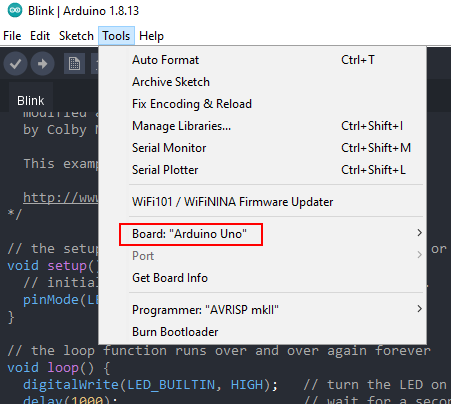
To keep things simple I will assume your project uses Arduino Uno. The benefit of CI is you can test your code against any number of Arduino platforms (including custom hardware definitions from Sparkfun and Adafruit) in one workflow.
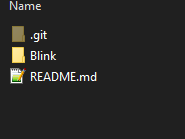
Save the project inside the cloned repo. This is what my directory looks like:
Push the changes to the GitHub repo. In your GitHub repo page click on Actions.
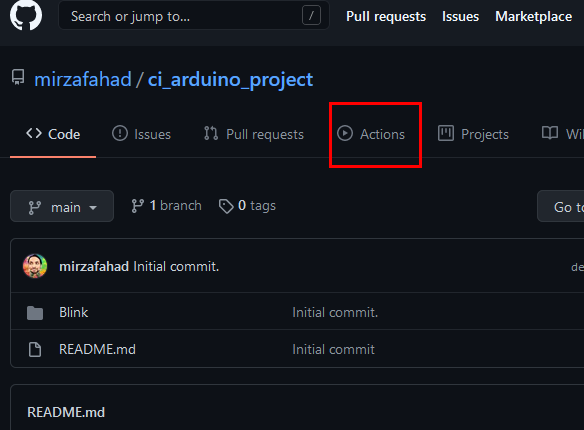
GitHub might suggest some workflows based on your programming language. In our case, we will go with the set up a workflow yourself.
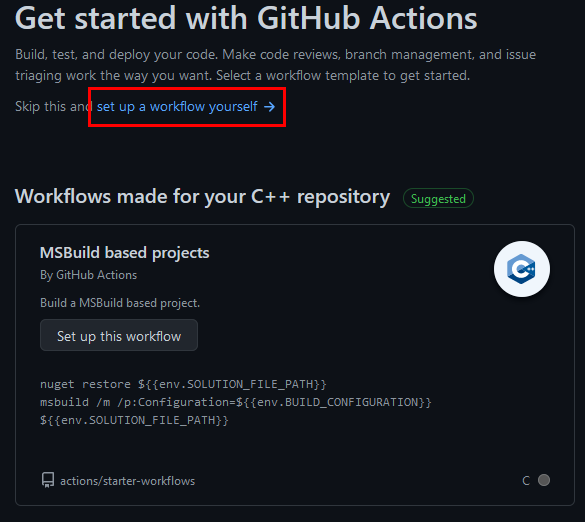
That will take you to the main.yml page.
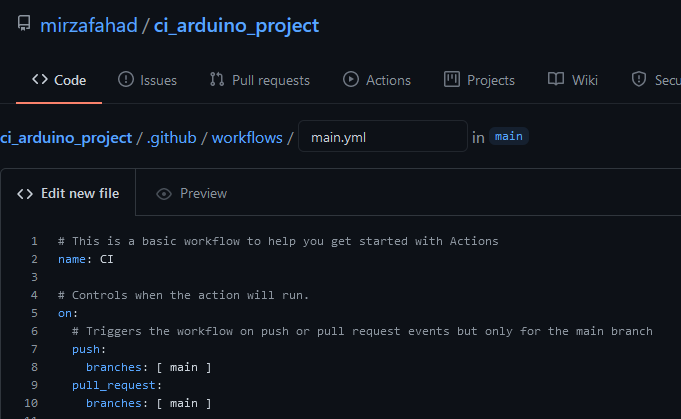
GitHub actions are event-driven. That means you can run a series of commands after a specified event has occurred. For example, everytime someone creates a pull-request for a repository you can automatically run a command (or a series of commands) that executes a software script. To do that GitHub action uses YAML syntax. In a YAML file, you will define the events, jobs, and steps. Then this YAML file will be stored in your code repository in the directory called .github/workflows.
Let’s replace the contents of main.yml with the following:
1
2
3
4
5
6
7
8
9
10
11
12
13
14
15
16
17
18
19
20
21
22
23
24
25
26
27
28
29
30
31
32
33
34
35
36
37
38
39
40
41
42
43
44
45
46
47
48
49
50
51
52
53
54
55
56
57
58
59
60
61
62
63
# This is the name of the workflow, visible on GitHub UI.
name: Arduino Build

# Controls when the action will run.
on:
  # Triggers the workflow on push or pull request only for the main branch
  push:
    branches: [ main ]
  pull_request:
    branches: [ main ]

# This is the list of jobs that will be run concurrently.
# Since we use a build matrix, the actual number of jobs
# started depends on how many configurations the matrix
# will produce.
jobs:
  # This is the name of the job - can be whatever.
  build:
    # Here we tell GitHub that the jobs must be determined
    # dynamically depending on a matrix configuration.
    strategy:
      matrix:
        # The matrix will produce one job for each configuration
        # parameter of type `arduino-platform`, in this case, it
        # is only 1.
        arduino-platform: ["arduino:avr"]
        # This is usually optional but we need to statically define the
        # FQBN of the boards we want to test for each platform. In the
        # future the CLI might automatically detect and download the
        # core needed to compile against a certain FQBN, at that point
        # the following `include` section will be useless.
        include:
          # This works like this: when the platformn is "arduino:avr",
          # the variable `fqbn` is set to "arduino:avr:uno".
          - arduino-platform: "arduino:avr"
            fqbn: "arduino:avr:uno"

    # This is the platform GitHub will use to run our workflow,
    # I picked ubuntu.
    runs-on: ubuntu-latest

    # This is the list of steps this job will run.
    steps:
      # First of all, we clone the repo using the `checkout` action.
      - name: Checkout
        uses: actions/checkout@main

      # We use the `arduino/setup-arduino-cli` action to install and
      # configure the Arduino CLI on the system.
      - name: Setup Arduino CLI
        uses: arduino/setup-arduino-cli@v1.1.1


      # We then install the platform, which one will be determined
      # dynamically by the build matrix.
      - name: Install platform
        run: |
          arduino-cli core update-index
          arduino-cli core install ${{ matrix.arduino-platform }}
      # Finally, we compile the sketch, using the FQBN that was set
      # in the build matrix.
      - name: Compile Sketch
        run: arduino-cli compile --fqbn ${{ matrix.fqbn }} ./Blink --warnings more
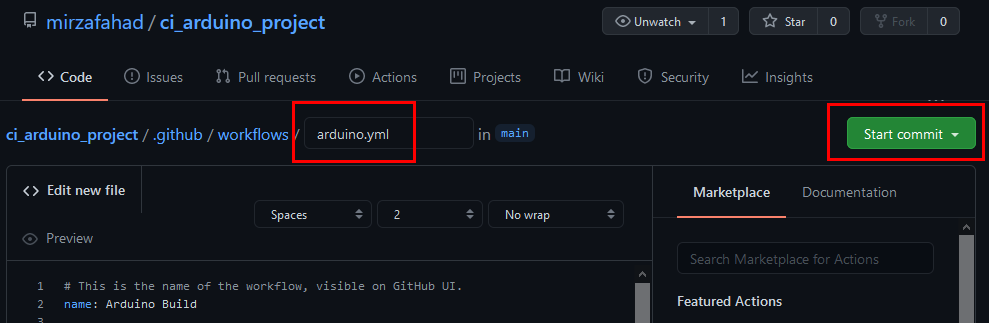
I will explain later what all these mean. You can change the file name to something meaningful. I changed mine to arduino.yml. Then click Start commit.
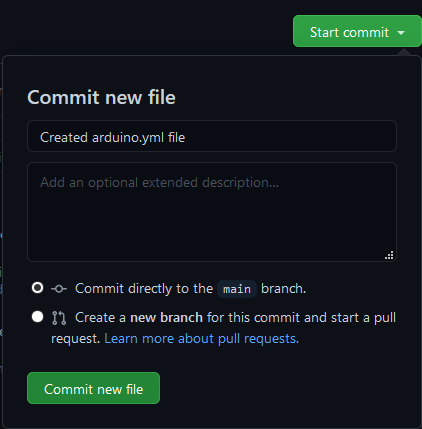
Type a short, meaningful commit message that describes the change you made to the file and click Commit new file.
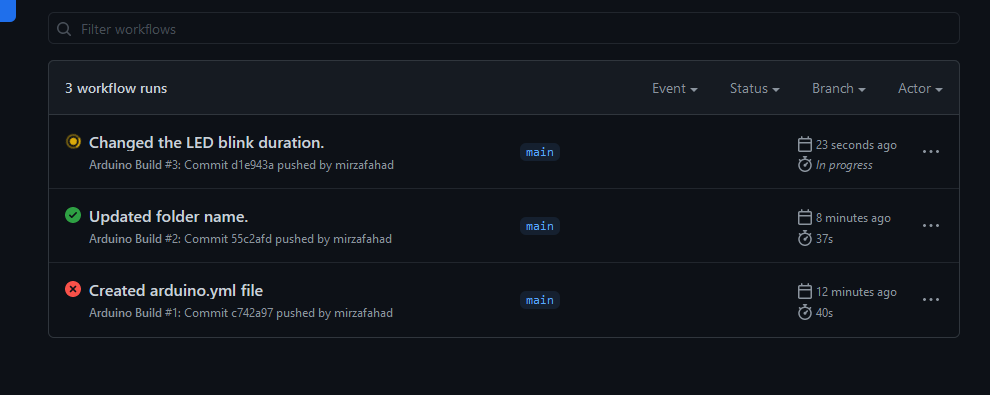
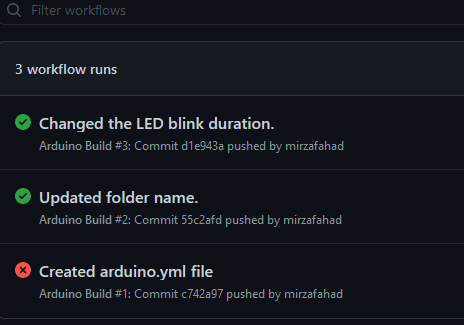
That will create the .github/workflows/ directory in your repo and put your arduino.yml inside that. Don’t forget to pull the changes into your local repo. Now make some changes in the blink example e.g. change the delay duration to 500ms and push those changes to the GitHub repo. Go to your GitHub repo page and click on Actions. You will see the script is running on your changes (yellow circle). Once it is passed a green checkmark will appear.
Workflow Status Badge
You can display a status badge in your repository to indicate the status of your workflows.
![]()
A status badge shows whether a workflow is currently failing or passing. A common place to add a status badge is in the README.md file of your repository, but you can add it to any web page you’d like. By default, badges display the status of your default branch. You can use the following markup line in the readme:

# e.g. in my case

I added that to my readme.
You can also get the status for a specific branch or event using the branch and event query parameters in the URL. To learn more visit this GitHub doc page.
In the next section, I will go through the YAML file and also show you some extra options e.g. how to compile your code for multiple platforms, adding other Arduino libraries into your build system, etc.
The YAML file

name: Arduino Build
That is the name of the workflow. You can use any name you want and it will be visible on GitHub UI and the workflow status badge.
on:
  push:
    branches: [ main ]
  pull_request:
    branches: [ main ]
The events when the action will be run. In this case, the workflow will trigger on push or pull-request event for the main branch.
jobs:
  build:
Under jobs, you will put all your jobs, script, etc. The will be run concurrently. They name of the job (build) can be anything.
strategy:
      matrix:
        arduino-platform: ["arduino:avr"]
        include:
          - arduino-platform: "arduino:avr"
            fqbn: "arduino:avr:uno"
In the strategy, we tell GitHub that the jobs must be determined dynamically depending on a matrix configuration. The matrix will produce one job for each configuration parameter of the type arduino-platform, in this case, it is only 1. You will also need to mention the Fully Qualified Board Name (FQBN), which in our case is UNO. If I wanted it to compile for Arduino Nano it would have been arduino:avr:nano.
Now, if I want to compile my project for both AVR and SAMD architecture I would add that under the matrix.
matrix:
    arduino-platform: ["arduino:samd", "arduino:avr"]
    include:
        - arduino-platform: "arduino:samd"
          fqbn: "arduino:samd:nano_33_iot"
        - arduino-platform: "arduino:avr"
          fqbn: "arduino:avr:uno"
runs-on: ubuntu-latest
runs-on: windows-latest
You can choose either platform for GitHub to run your workflow.
steps:
    - name: Checkout
      uses: actions/checkout@main
steps consists of a list of steps that the job build will run. The first step is the checkout of the repository with the source code. The name tag is just that, a name of the step. uses is the actual action of checking out the main branch. If your main branch is called master, then change that line to: actions/checkout@master.
- name: Setup Arduino CLI
  uses: arduino/setup-arduino-cli@v1.1.1
The Arduino CLI can be installed using the official GitHub Action. This Action installs the Arduino CLI in the workflow environment so it can be used in the next steps. Check the Arduino CLI repo for the latest version number. At the time of writing it is 1.1.1.
- name: Install platform
  run: |
    arduino-cli core update-index
    arduino-cli core install ${{ matrix.arduino-platform }}
Next, it will install the core platform, determined dynamically by the build matrix. If you have, for example, both AVR and SAMD, it will install both platforms.
A “core” (or platform) is a collection of tools and definitions required to compile and upload to a specific board. You can compile and upload to 3rd party boards with the Arduino CLI too. To install a 3rd party core, along with the name of the core, you will need an URL that defines a list of files. Here is an example of how you can do so for SparkFun:avr core.
- run: |
    arduino-cli core update-index --additional-urls https://raw.githubusercontent.com/sparkfun/Arduino_Boards/master/IDE_Board_Manager/package_sparkfun_index.json
    arduino-cli core install SparkFun:avr@1.1.5 --additional-urls https://raw.githubusercontent.com/sparkfun/Arduino_Boards/master/IDE_Board_Manager/package_sparkfun_index.json
If you want to install any required libraries that your project uses it is time to do so now:
- name: Install libraries
  run: arduino-cli lib install "Adafruit_NeoPixel@1.7.0"
Here I am installing the Adafruit_NeoPixel library with specific version 1.7.0.
- name: Compile Sketch
  run: arduino-cli compile --fqbn ${{ matrix.fqbn }} ./Blink --warnings more
All we are left with compiling the sketch. The FQBN will be pulled from the matrix. You will have to mention your sketch name. --warnings more is optional, but will enable more warnings.
CI for Arduino Libraries
When it comes to Arduino libraries most of the steps are the same. Arduino CLI can only compile sketches, so you can not directly compile your library source code. When writing an Arduino library, you most probably also provide examples, for users, to show how to use your library. These examples are Arduino sketches in the examples/ directory of the library. So, now you can use the Arduino CLI to compile the example sketches of the library and indirectly compile and verify the library source code. Pretty neat, huh?
So the first thing you will need to do is install your library into the Arduino’s libraries folder. You already checked out the repo. So you can move that code or create a symlink in the libraries folder. If you are familiar with the Linux command line then you already know the commands.
- name: Install repo as library
  run: |
    mkdir -p "$HOME/Arduino/libraries"
    ln -s "$PWD" "$HOME/Arduino/libraries/."
$HOME/Arduino/libraries is where Arduino install libraries in Linux. ln make links between files. At the end all you have to do is compile a sketch from the example folder:
- name: Compile Sketch
  run: arduino-cli compile --fqbn ${{ matrix.fqbn }} ./examples/Simple_Blink --warnings more
An example can be found for my Arduino Time Server library.